Thursday, December 24, 2015

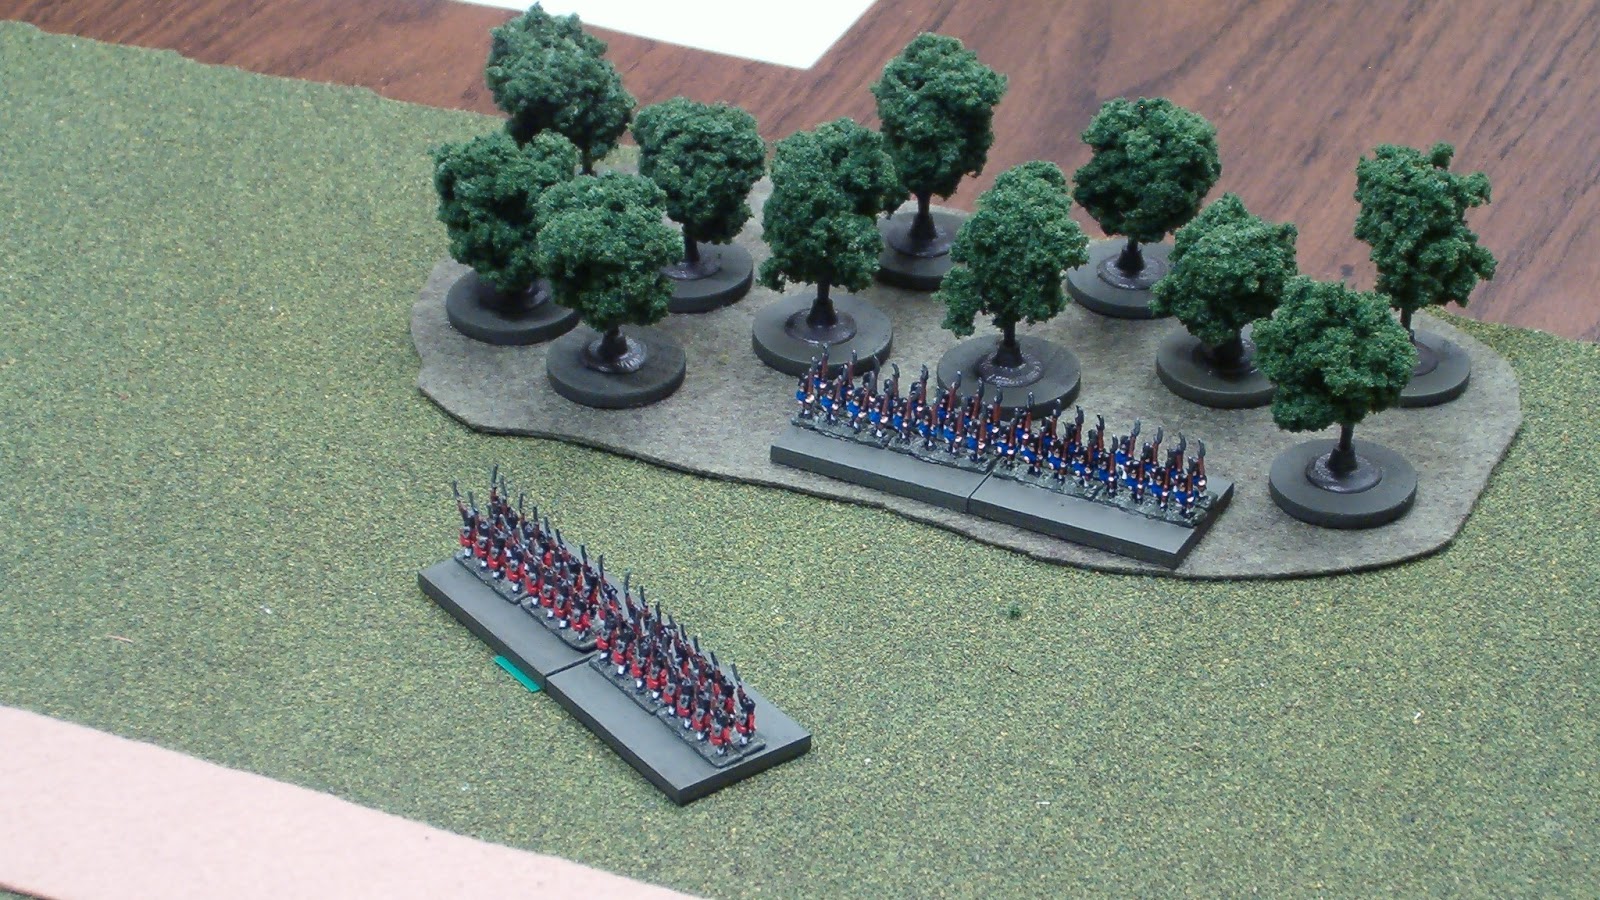
A Cambronne Christmas

May your holidays be filled with peace, good company, and childlike joy!


"It is for you, dear reader, now to get a floor, a friend, some soldiers and some guns, and show your appreciation of this beautiful gift of a limitless game. How much better is this amiable miniature than the Real Thing! Here is the thrill of victory and disaster – and no smashed nor sanguinary bodies, no shattered fine buildings nor devastated country sides that we know to be the reality of belligerence. You have only to play at Little Wars to realize what a blundering thing Great War must be."

 – H. G. Wells, Little Wars 
(modified by the blog author)

Thursday, June 18, 2015

Waterloo Bicentennial Game

Today I commemorated the 200th anniversary of the Battle of Waterloo by playing a small Waterloo-themed game. Very appropriately, we had torrential rain last night, which finally gave way early this morning. Once the ground had dried out, I spent the early afternoon playing Scenario 4 "Take the High Ground" from Neil Thomas' One-Hour Wargames.

The game was accompanied by proper background music:


I treated the scenario as a small, fictitious portion of the French attack on the Anglo-Allied center. To win, either army needed to be the sole occupant of the hill at the end of turn 15. Here is how the battle unfolded:

Introduction: Two isolated British regiments occupy a forward position on a low hill in the center of the Anglo-Allied line. The French have spotted this, and have set out to seize the high ground before British reinforcements arrive.

Turn 1: The British send reinforcements down the road to get support near the hill as soon as possible. One regiment heads over open ground to support the two regiments already on the hill. The French send their cavalry up the road to delay the British reinforcements, while the light infantry follow them, intending to occupy the woods from which they can harass British movement on the road. The rest of the French force assaults the hill.

End of Turn 1

Turn 2: The French and British cavalry clash on the road, and the French infantry and artillery trade fire with the British regiments on the hill. The rest of the British troops move up, as the French light infantry occupy the woods.

End of Turn 2: I foolishly forgot the rule that says cavalry recoil after melee
unless they eliminate the opposing unit; hence the technically improper maintenance
of cavalry in base contact with each other at the end of several turns.

Turn 3: The French manage to rout one of the British regiments on the hill. Meanwhile, the British reinforcements begin to deploy, as the cavalry clash continues to rage.

End of Turn 3: I keep routing units on the table,
but off to the edge facing away from the enemy.

Turn 4: The British regiments on the hill adopt a "reverse slope" tactic, forcing the French to advance into their field of fire. Meanwhile the artillery and infantry of both sides continue to exchange fire, while the cavalry continue their melee.

End of Turn 4

Turn 5: The British artillery get the worse of their fire exchange and rout from the field. Two French infantry regiments advance onto the hill. For a moment, it looks like everything is going the Emperor's way.

End of Turn 5

Turn 6: Finally good news for the British – the cavalry have driven off their French counterparts. The British cavalry is near exhaustion however, and the French infantry turn to shoot at them, protecting the artillery and staying in line formation to maximize firepower against the fatigued horsemen.

End of Turn 6

Turn 6 Close-up: A furious exchange of volleys on the hill.

Turn 7: The British horse take flight before the withering volleys of the French infantry straddling the road. So far, half the British force has routed, while only one French unit has been eliminated. However, many of the French units are severely weakened and are approaching the limits of how much punishment they can take.

End of Turn 7

Turn 8: One of the weakened French infantry regiments attacking the hill is routed. The remaining French infantry and artillery push toward the hill to take its place, as the light infantry in the woods continue to exchange fire with the British infantry facing them. These two adversaries are both taking damage, but the British line infantry are inflicting more casualties than the French light infantry, despite the fact that the latter have the cover of the woods. 

End of Turn 8

Turn 9: The French drive one of the British regiments off the hill.

Turn 9 Close-up: Things are coming to a head on the hill.

Turn 9 Close-up: The firefight near the woods continues unabated.

Turn 10: The French infantry climb the hill to join the artillery in the firefight against the last enemy regiment there.

Turn 10 Close-up: Can the British hold the hill?

Turn 11: The British infantry finally get the better of the French skirmishers in the woods, driving them back.

End of Turn 11

Turn 11 Close-up: The French light infantry rout.

Turn 12: The British eliminate the French artillery on the hill, as the infantry previously facing the French in the woods turn to march on the hill. For the first time in the game, the French are outnumbered. The tactical situation is prickly as all the units remaining are very near to breaking, while their fields of fire are all over the place. The British infantry on the hill can currently fire on no one, and is being fired on from the flank by the French, who in turn will be fired on from the rear next turn. The question is who will hold?

Turn 12 Close-up: situation critical – the French are outnumbered, 
but maybe they have some positional compensation. 

Turn 13: The French eliminate the last British regiment on the hill, but start taking heavy damage from the English infantry to their rear. It will be very difficult for the French to reciprocate.

Turn 13 Close-up: even if they turn to face the British next turn, 
the French will be hard-pressed to survive a firefight.

Turn 14: The British go first each turn. They fire on the French to start this turn, as there is nothing else for them to do – infantry are not allowed to charge in these rules. They inflict severe damage that brings the French unit to 13 hits (a unit is eliminated at 15 hits and a fire attack does 1-6 hits worth of damage). Units cannot move and fire in the same turn. So, if the French turn to face the British, the French won't get to fire this turn. That means the British will get off a second volley at the start of turn 15 most likely killing the French unit and ending the game in a draw, since they themselves would not be able to move onto the hill after firing. BUT, the French don't have to stay where they are. Instead they move to a reverse slope position out of British line of sight, just as the British themselves had done back on turn 4! Only then do they turn about face. Now, if the British don't have enough movement to get up the hill, the French will win. Even if the British do manage to get up the hill, the French will have a final shot with a 50-50 chance of eliminating the British regiment, who is at 11 hits.

Turn 14 Close-up: The French found the positional tactic they needed
to shift the game back in their favor. Can the British make it up the hill?

Turn 15: The British fall just short! Their movement of four inches allows them to reach the base edge, but not to actually get onto the hill itself. The French win!

Turn 15 Close-up: Just out of curiosity, I rolled a die after the game
to see what the fire effect would have been if the British had made it up the hill. 
I rolled a four – just enough to kill the British unit anyway.

Looking on at the hill he'd just lost, Wellington shook his head. "It was a near run thing. The nearest run thing you ever saw in your life."

Wednesday, June 17, 2015

Waterloo Armies Ready to Go

The models are all based, so I'm all set for tomorrow's small Waterloo bicentennial game.


I'm using Scenario 4 from One-Hour Wargames, "Take the High Ground." It will be a fictitious, localized part of the French attack on the Anglo-Allied center. My terrain is prepared: 


Since I'm playing on a 2' x 2' surface rather than 3' x 3' all measurements will be reduced to 2/3. My measuring sticks are adapted accordingly: 


And last but not least, my color-coded roster sheet is ready: 


Vive l'Empereur!


Tuesday, June 16, 2015

Forced March: Setting Myself a Waterloo Anniversary Painting Challenge

Back to the painting table after a very long absence. Partly this was due to the usual real life suspects (semester from hell at work, new adorable pet, etc., etc., yeah, yeah you've heard it all before), and then later due to a three-and-a-half week stay in France after the semester ended. Being in France, I was of course reminded on numerous occasions that June 18 of this year marks the bicentennial anniversary of the Battle of Waterloo.

So this past weekend, I set myself a "Waterloo Anniversary Painting Challenge" to try and have a small French vs. British game using One-Hour Wargames on the 18th to commemorate the event in my own small way.

This was a tricky proposition since:

1) I decided I wanted to have units twice the size of those I used previously so I'd have to paint some more French than I already have; and

2) I had no painted British troops at all.

Fortuntately, the simple painting method I used before made this doable.

French: 48 Infantry to round out what I already have; 
British: 128 Infantry, 12 Cavalry, 2 Guns and 4 crew.

Here's how my "forced march" has broken down time-wise to this point, with only the final basing to go:

June 13 (four hours spread across multiple sessions): Early morning, stuck 194 unpainted 6mm minis (mostly in four-man strips) on tongue depressors with blu-tack, then primed them black. Afternoon, a first coat of color on all the jackets, then in the evening a second coat, and finally the British got a third coat (red always seems to need that extra layer) that night. I also painted the wooden bases they'll eventually get glued to.

June 14 (four hours spread across multiple sessions): Painted trousers, horses, artillery pieces, and the ground on each model/strip. Then touched up a number of sloppy bits with black.

June 15 (four hours spread across multiple sessions): Painted backpacks, weapons, and flesh.

June 16 (two hours in two sessions): Morning, touched up any little spots where I "went outside the lines." Afternoon, sprayed them with a protective clearcoat.

All that remains is to glue them to their wooden bases, which I'll do this evening or tomorrow morning, once the spray clear coat is completely dry. I expect that to take about one hour.

All told, I will have completed 194 miniatures start to finish in roughly 15 hours over four days. Looks like I'm good to go for June 18 with a day to spare. With any other size miniature cranking out this many models in so few days would have been impossible. I love 6mm.

Monday, June 15, 2015

Sunday, February 1, 2015

The Battle of the Stippgrütze Hills (Fictional), 1805

A fictional battle, to test Neil Thomas' One-Hour Wargame Rules (Chapter 11 "Horse and Musket Wargames Rules," Chapter 22 "Solo Wargaming," and Scenario 1 "Pitched Battle [1]"). 


Introduction

As the French army crossed the Rhine, General Maille was dispatched with a detachment to advance into the hills of Stippgrütze, where they encountered an Austrian force under the command of General Inglehoffer. The two generals gathered their forces on and around the hills on opposite sides of a valley, and then pressed forward to battle.


Order of Battle

The French (General Maille)
     One Artillery Unit
     Three Infantry Units
     Two Skirmisher Units

The Austrians (General Inglehoffer)
     One Artillery Unit
     Four Infantry Units
     One Skirmisher Unit


Deployment

Maille perceived that he was at a disadvantage. The battlefield consisted of a flat, empty valley between two large hills. However, a full third of his force was made up of skirmishers, who needed the cover of woods to be fully effective. Without any woods to speak of [the trees in this scenario are just for decoration], Maille's skirmishers would be very exposed.

With no cavalry on the field for either army, Maille decided to use the skirmishers' one remaining strength – their speed – as the basis for his plan. He would position both units of skirmishers on the right flank, with a unit of infantry just to their left. Under covering fire from the artillery, the infantry unit would ideally advance to pin the facing enemy wing in place, while the skirmishers attempted to run around the flank of the pinned enemy wing.

Unfortunately, as the armies prepared for battle [using the solo set-up rules] Maille's force was outdeployed from the start, augmenting his difficulties. Inglehoffer too decided to launch an assault on the French right, which meant the bulk of the Austrians' mostly-infantry force would be facing off against Maille's skirmishers. In a shooting match between the two, the French skirmishers would be unlikely to prevail.

Positions at the start of the game, from the French side of the board.


Game Turns 1-3

The French shift their weight from the right to the center, and the Austrians focus on the flanks [this was determined by weighted random die rolls for the Austrians]. 

Both sides begin to exchange fire, with the Austrians initially getting the better of the exchange. But the French quickly catch up. Both sides manage to rally somewhat [solo random event rolls – Chapter 22] and the Austrians experience some confusion on turn 3 [solo random event roll – Chapter 22] and are unable to move and shift to reinforce the center. The French are doing well in the center, if only their flanks can hold out. 

End of Game Turn 3. 
Numbers next to units indicate how many hits they've taken.
Units are eliminated at -15.

Game Turns 4-6

The French flanks crumble as does the Austrian center. For a moment, it appears that the French are holding their own in the firefight, but the Austrians begin to inflict more casualties than the French. The Maille's light infantry push forward toward Inglehoffer's artillery, but the Austrians turn in from the flanks toward the center.

End of Game Turn 5.
Turn 6 would see the Austrian flanks swing in toward the center.


Game Turns 7-9

The French experience a momentary confusion, stopping their advance up toward the Austrian-held hill. Meanwhile, Inglehoffer's troops press inward from the flanks. Their withering fire inflict more casualties on the French. The French return fire, causing one more Austrian unit to melt away, but it is not enough. The Austrians gain the initiative [solo random event roll – Chapter 22] which allows them to bring the fire of all their remaining troops against Maille's last skirmisher unit, destroying it. 

End of Game Turn 9

With only his artillery remaining, and outnumbered three to one, Maille decides to save his ordnance and withdraw, leaving the field to his Austrian nemesis.

Aftermath

In the evening, out of harm's way, Maille critiqued his own performance. Though he started at a disadvantage with fewer line infantry and no good terrain suitable for his skirmishers, he believed he could have better acquitted himself by making a more judicious advance toward the enemy, and by keeping troops in reserve to counter-punch once the enemy was drawn in on his terms.


Impressions

A short, thoroughly enjoyable game. Just the ticket for a quick session of piece-pushing and dice-slinging. The mechanics seemed to work well for the period. I'm not an expert on musket-era warfare by any means, but my understanding is that infantry fights tended to grind down into musketry duels from which it was hard for either unit to extricate itself. While the rules don't have any specific stipulation that an infantry unit cannot pull out of a firefight, they work in such a way that there really seems to be no benefit to doing so, and that your best bet is to stick it out until you or the other guy withers away. One other thing I would do very differently is to hold back a unit in reserve and wait to see how things were unfolding before committing it as a sort of hammer blow against a weakened enemy unit. I didn't think to much about that since I was mostly just trying out the rules for the first time, but as the game moved along, it seemed to me that these rules would really reward that use of a reserve. 


Thursday, January 1, 2015

Napoleonic Austrians to Start the Year

A Happy New Year to all!  I closed out the old and rang in the new yesterday and this morning by completing most of my 1HW Austrians.

6mm Austrians from Baccus

Four line infantry, two light infantry and two artillery for a total of eight units.

Zoomed in view...

All I have left to do are two units of cavalry, and my 1HW Austrian army set will be complete.   

French and Austrians lining up for battle

Been working on terrain too. The felt I ordered arrived, and I tried a (for me) new hill making technique by "gift wrapping" some beveled wood blocks in the same felt I'm using for the flat terrain. A bit stylized, but very practical. Trees have arrived as well -- I had nothing appropriate for 6mm minis on a 15" square battlefield -- and I mounted them on 1" round bases.

Of course the next steps are to play out a full game, put up a bat rep, and then finish painting my Austrian cavalry.

After that some more terrain. I still have some buildings to paint, some blue and tan felt to cut into rivers and roads, and some hobby wood to build a bridge or two.

Sunday, December 21, 2014

One-Hour Wargames 6mm French Army Set (and a Church)

Grading papers and pre-holiday travel made the last two weeks hectic, but I still got some painting done. I also decided I didn't look the sparse look of my 6mm troops spread out on the 2" x 2" bases, so I re-based (glad I didn't flock) on 1.5" x 1" bases, in double line for infantry, single line for cavalry, and I like them much better this way.


So now my French Army set for One-Hour Wargames is done:

4 Line Infantry Units
2 Cavalry Units
2 Artillery Units
2 Light Infantry Units

With the units on smaller bases, I'll probably make the battlefield smaller than I originally intended (probably 15" x 15" or so) and switch the range and movement measurements to cm rather than the inches as in the R.A.W. After seeing the successful play through at Shaun's Wargaming with Miniatures blog on a 12" x 12" battlefield, I'm not worried about playing on a smaller area. It obviously works just fine, and a game space approximating the dimensions of a moderately sized chess board will fit nicely on the desk in my study.

I also picked up some Baccus 6mm Napoleonic British (even though I've already got the Austrians in the queue for the work bench), as well as some 6mm buildings in the "Simply 6" range sold by Scale Creep Miniatures.


I've got a few more buildings to work on, which should be enough for two small villages or one medium-sized town.

Saturday, December 13, 2014

6mm French Cavalry

It's not the Grande Armée yet, but it's growing.

Despite being swamped with end-of-semester grading and pre-holiday prep, I managed to complete a unit of cuirassiers and added flags to the previously painted infantry.


Some thoughts:

  • The blue looks a lot lighter in the photos than it does to the naked eye; "in person" the blue looks much darker (and from far enough away it actually just looks black).
  • For unit flags I went with a simplified late Napoleonic-era tricolore style solely because the larger vertical blocks of color stood out better when viewed from a distance, compared to the early-era unit flags with colored corners (I tried the latter and then removed them, replacing them with the later flags). The flags came from www.warflag.com.   
  • I haven't flocked these yet; I'm not 100% sure this is how I want them based, and it'll be easier to change my mind and re-base if they're not flocked; so just for now I'll keep the bases plain.
  • I'm going to do two units more French units (enough to make one One-Hour Wargames army), then I'll move on to the Austrians and finish enough for an opposing army so I can play while completing the remaining 4 units for each army's full set.

Monday, December 1, 2014

Three French Infantry Battalions Done

Progress on the One-Hour Wargames project: three 6mm French infantry battalions done.

Normal view from about 18 inches away:


Zoomed view:


Still need to properly base and flock them, and add flags.

Wednesday, November 26, 2014

First 6mm Unit – Comparing Mini Sizes and Painting Times

One of the reasons I want to start painting 6mm is that I just don't have the time for larger figures and everyone who has tried 6mm seems to assert they are much faster than larger scales.

Some years ago, I decided I wanted to try a Napoleonic skirmish game in 54mm. I painted this fellow, the first of what was supposed to be a "squad" of French light infantry:


This mini took me about four hours to paint – not including priming, overcoating, basing and flocking – and he ended up being the only 54mm Napoleonic model I ever completed.

Smaller size minis – for example, my 28mm fantasy figures – take me about two hours each to paint.

In starting my 6mm Napoleonic project, I chose to time how long it took to paint my first unit of 32 French line infantry, for comparison. I used a very basic paint job, since at a normal viewing distance of one to two feet or so, it is impossible to see much, if any, detail (though more on this below).


I adopted the painting process from Neil Thomas' One-Hour Wargames which seems ideal for such small minis:
"When painting begins, an assembly line process can be adopted. Let us assume that the budding wargamer has acquired some British Napoleonic infantry of the Waterloo campaign, and has prepared 12 figures ready for painting by giving them a black undercoat. The next step is to paint all the jackets in red. Once the last figure has had its jacket painted, the first miniature should be dry enough to paint the trousers in grey. This is followed by the hands and face (flesh or pink paint), and finally the base (green). The black undercoat can legitimately suffice for the other parts of the figure, covering muskets, shoes, backpack and headwear."
I added a tiny bit more detail, but otherwise followed this approach. After mounting with blu-tack and priming black, I painted the following: green bases (15 minutes), white trousers (15 minutes), blue tunics first coat (15 minutes), blue tunics second coat (7 minutes), brown muskets (7 minutes), brown backpacks (9 minutes), flesh (9 minutes), all metal items (6 minutes), general touch-up (5 minutes).

The total time for post-priming application of color was 88 minutes. One-and-a-half hours to paint 32 men, as opposed to two hours for a single 28mm mini, or four hours for a single 54mm figure.  This is a huge change.

With such a basic paint scheme, these models don't look like much close up:


But from just one or two feet away, they look very much the part, I think:


You may be wondering why I didn't paint the lapels and crossbelts white. Well, I did. Then I undid that (which added another 15 minutes to the painting time, but that won't happen again, so it doesn't count). Painting the lapels and crossbelts created a very bizarre effect. The crossbelts and lapels looked right close up on each individual man, but from a distance they looked completely wrong. The whole mass just looked like a white blob, with the white thoroughly dominating and washing out the blue of the tunics such that there was no blue visible at all from a distance. So I went back over the crossbelts and lapels with blue and decided to leave them that way. Now they don't look quite right as individual men, but the mass as a whole looks better to me, and that's the effect I want.


Sunday, November 23, 2014

Jumping Back In With 6mm Napoleonics

After a two-year hiatus from painting (for which I mostly blame professional issues) I ordered two army sets of Baccus 6mm Napoleonics – one French, one Austrian – which arrived in the mail yesterday. I plan to use these with Neil Thomas' One-Hour Wargames Rules (1HW).

Opposing French and Austrians in 6mm on a 2' x 2' battlefield.

Armies in 1HW consist of 6 units, though with variable composition a complete "army set" for any given nationality requires 10 units. For the horse and musket era, this comes out to:

4 x line infantry
2 x light infantry
2 x artillery
2 x cavalry

In practice an army will have on the table 3-4 units of line infantry plus 2-3 units of other types for a total of 6 units in a game.

6mm French from Baccus

Normally played with 15-25mm models in units with a frontage of 4-6 inches each on a 3' x 3' battlefield, I'm going a bit smaller, using 6mm models on a 2' x 2' battlefield (and of course all movement rates and weapon ranges cut to 2/3).

6mm Austrians from Baccus

I have a ton of bases on hand and I worked out my basing last night by experimenting with different configurations. What I liked best were 2" square bases (i.e. a 2" frontage) with the following numbers of models in each one-base unit.

32 foot figures for line infantry
16 foot figures for light infantry
12 mounted figures for cavalry
2 guns + 8 crew for artillery

A close-up of line infantry, light infantry and cavalry.

Today I hope to get all the models stuck on to tongue depressors with blu-tack and primed in black. Painting "the unit not the man" will be a new experience for me. Everyone seems to assert that painting 6mm models is faster and easier than painting larger minis. I'll find out for myself in the next couple weeks.

Monday, November 17, 2014

One-Hour Wargames by Neil Thomas – A Bullet-Point Review

Neil Thomas' book One-Hour Wargames hits the mark for its intended purpose and audience: "Practical Tabletop Battles for those with Limited Time and Space." The rules are for games with four to six units per side, fought on a three-foot-by-three-foot square battlefield.  With the demands of my job and very limited hobby time, this book has inspired me to jump back into miniature wargaming after a rather long two-year hiatus.


The book's main features include:

  • practical and simple painting and terrain tips
  • simple rules for nine different periods (ancient, dark ages, medieval, pike & shot, horse & musket, rifle & sabre, machine age, WWII)
  • thirty non-period-specific scenarios
  • simple campaign suggestions
  • simple solo wargaming suggestions

What I like about these rules:

  • they demand only a minimal investment of time
  • they favor a small size of the playing surface
  • they allow for flexible figure basing (standard base size, put however minis look right on it)
  • the rules for each period have common base mechanisms
  • special rules give each period a unique flavor

I recommend book to you if you are:

  • a newcomer to wargaming
  • an experienced gamer without the time to paint large numbers of figures
  • an experienced gamer without the time or space for physically large games
  • an experienced gamer who just likes simple rules


Sunday, November 16, 2014

The Last Square

"When this legion had been reduced to a handful, when nothing was left of their flag but a rag, when their guns, the bullets all gone, were no longer anything but clubs, when the heap of corpses was larger than the group of survivors, there reigned among the conquerors, around those men dying so sublimely, a sort of sacred terror, and the English artillery, taking breath, became silent. This furnished a sort of respite. These combatants had around them something in the nature of a swarm of spectres, silhouettes of men on horseback, the black profiles of cannon, the white sky viewed through wheels and gun-carriages, the colossal death's-head, which the heroes saw constantly through the smoke, in the depths of the battle, advanced upon them and gazed at them. Through the shades of twilight they could hear the pieces being loaded; the matches all lighted, like the eyes of tigers at night, formed a circle round their heads; all the lintstocks of the English batteries approached the cannons, and then, with emotion, holding the supreme moment suspended above these men, an English general, Colville according to some, Maitland according to others, shouted to them, "Surrender, brave Frenchmen!" Cambronne replied, "Merde!"

Victor Hugo, Les Misérables (1862, Trans. 1887 by Isabel F. Hapgood). Vol. II, Book I "Waterloo," Chapter XIV, "The Last Square."